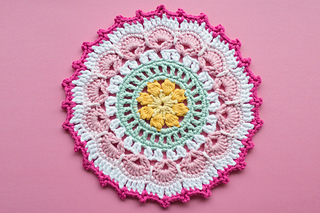
I am writing this blog sitting at the kitchen table in bright sunshine this morning. We seem to have been waiting for our warm sunny weather for so long this year and it really is a treat to know that we are in for a scorching day here in London town, however, my mood is not really as it should be on such a lovely summer's day. I heard yesterday that a fellow crochet designer Marinke Slump (otherwise known as Wink) took her own life on Friday after a battle with severe depression. Wink was a fabulous crochet designer, her projects were bright and fun and she will be sadly missed within the crochet community.
Wink's death has of course sparked a huge wave of condolences and expressions of sadness on social media forums and so the crochet community has come together and asked that people pay their respects by sharing a crochet mandala with the hashtag #mandalasforwink. You can also share a photo of yourself with flowers in your hair is you would rather #wearingflowersinmyhairforwink
You can read the final posts on Wink's blog by following this link. You will also find a wealth of her lovely mandala designs on her web site should you wish to make one. You can find more information about making a mandala in her memory by following this link.
Today the penultimate set of patterns for the Stylecraft CAL have been published via their web site. The patterns feature another lily flower block and you need to make 4 of them if you are working on the Lily Pond CAL. There is also some finishing that you can do this week so that you are all ready for the final set of patterns in a fortnight's time. A link to this set of patterns is here.
The Medium Lily Flower in this set of patterns is made in a very similar way to the last few you have made, so there are no major surprises, but there is a little bit of making up to do.
Below are the step by step images for making the Medium Flower Block:
Once you have completed the flower at the end of Round 6 you need to create the frame work for the remaining part of the block. In the same way as you have worked for all the other larger flowers, you need to build a framework behind the existing petals by working into the remaining parts of stitches on the reverse of the work. Make sure you catch both yarn loops which sit centrally between the petals:
The image below shows the framework from the reverse side of the work
The image below shows the framework from the front side of the work
Knitters and Crocheters are famous collectively for the fact that the majority of them hate the sewing up and making up process of their projects. This is to be expected I suppose, as the craft they enjoy is the knitting or crochet and the making up is simply a by product of this process, however if you spend a little time practising and make sure you are relaxed and calm about the process you will find you will achieve some great results!
It is my experience that many crafters leave far too little time for the making up process and therefore get frustrated when a piece isn't completed in the space of about half hour! I have been known to sit for days working on the finishing process of a piece, indeed, one of the crochet blankets in my book 'Homespun Vintage' took me 3 days solid to put together and work the edging!
If you do the finishing in the stages I suggest you will find the process far easier than doing it all in one go at the end. I always sew my yarn ends in as I go along; sewing in after I complete each block so that they are ready for the finishing process once all the crochet is complete. I also mark my pieces with stitch markers so that I can line them up easily to join on the reverse side.
I know that the slip stitches along the side of some of the swatches have driven some of you crazy, but making slip stitches along a side edge, which are then used as the stitches to join your pieces together is the neatest way I know of joining crochet pieces that have been worked in rows.
If you would rather not have a pronounced ridge on the reverse side of the work, you could always use slip stitches instead of double crochet (US single crochet) as your joining stitches, but you will need to make sure you don't work your stitches too tight. If you would rather sew your pieces together you could use a mattress stitch.
I hope you enjoy working through the patterns in Set 7. Thank you to all those of you who have taken the time to send me lovely emails and pictures of your projects - I am so glad that so many of you are having a lovely time working through the Lily Pond CAL.
Janie x


